I spend a lot of time in my kitchen, and the 70’s or 80’s vibe in the kitchen of my Victorian house was not working for me.
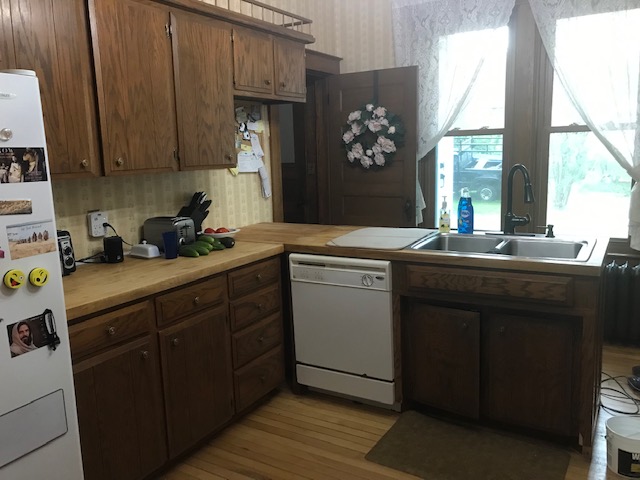
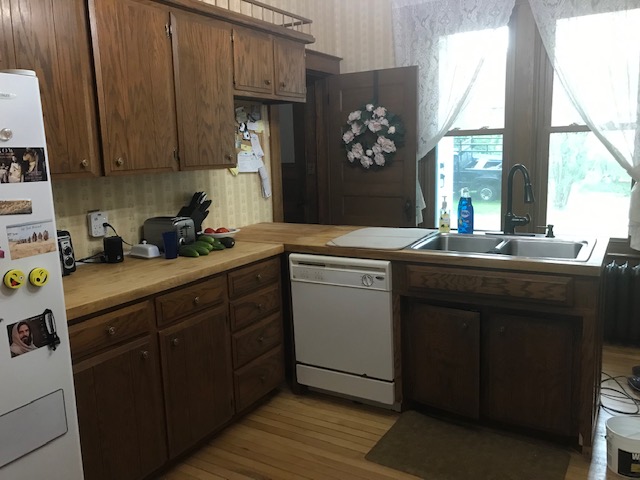
First of all, I didn’t love the peninsula. Yes, it allowed me a view out the window while washing dishes, but the view is just of my driveway and my neighbor’s driveway and house. Not too exciting. The only time it’s a good view is in the spring when the lilacs are in bloom, which lasts about a week. But the peninsula also creates a weird flow in the room. It’s like a really narrow hallway and it makes the kitchen feel small, even though it’s a big room. And that corner is worthless as counter space. It ended up being the place where mail and other papers got piled. Also, not having a wall behind the sink meant the soap dispenser was constantly falling off the edge of the counter. I couldn’t have my frog SOS pad holder out because I was afraid it would fall off the counter and break. I decided to move the sink and dishwasher to a different wall, to the right of the window. Here’s what was there.
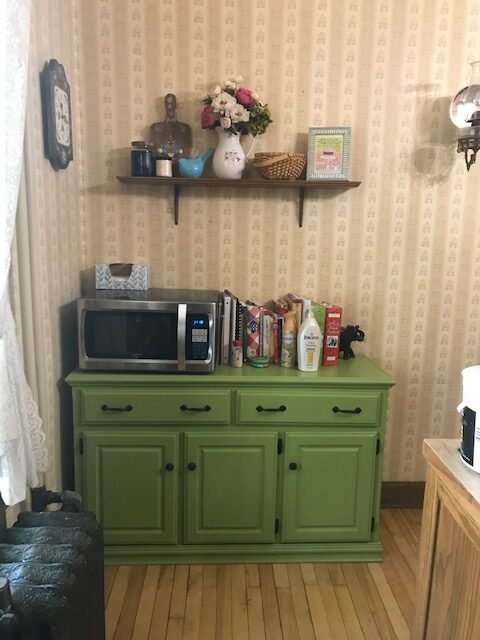
i brought this cute little cabinet with me from my old house. It’s an oak buffet that I bought used, painted green, and replaced the hardware. The color happened to match the wallpaper and the size was perfect for the space. At first I thought of altering it fit a sink, but it’s too short and not deep enough, and that seemed like a lot of work. Instead I found a different cabinet and painted it the exact same color.
Now I’ve been thinking about remodeling for a long time, collecting pieces as I found them. Of course, I didn’t want a modern kitchen. No, instead I wanted to replace my old cabinets with even older ones. First I found this set of upper and lower cabinets that looks like it came out of an old butler’s pantry. It seemed at the time like it was in super great shape. It turned out to need a little more help than I originally thought.
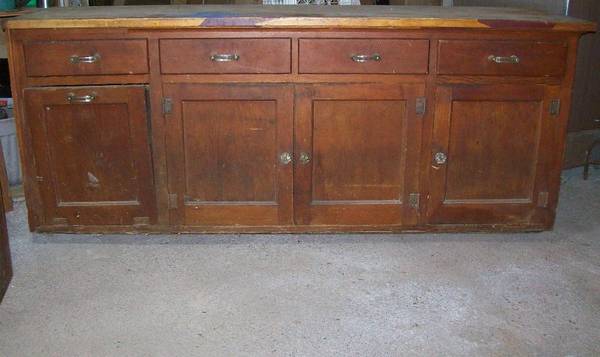
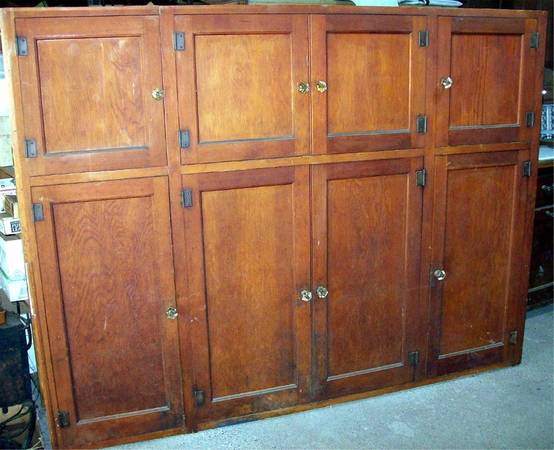
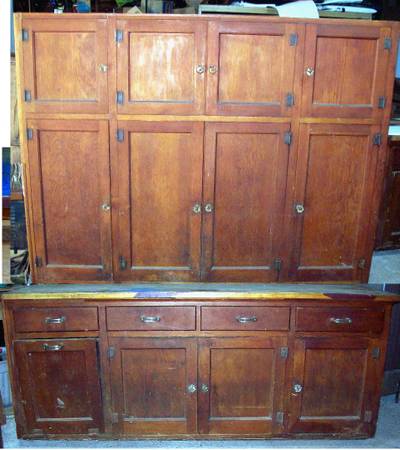
You probably can see already how delusional I was. The finish is not great. The flour bin on the lower cabinet doesn’t close right, and the counter is partially covered in wood-grained contact paper. (The wood is warped and can’t be used anyway. What you can’t see is that there are tiny paint specks over most of it, some of the hinges are rusty, and the bottom corner of the lower cabinet by the flour bin has some serious water damage. I think it lived in a garage after being taken out of the house. And it didn’t help it any being in my garage for 2 years while I procrastinated refinishing it. (That turned out to be a good thing.) But this project is part 2 of the kitchen remodel, so I’ll leave it there.
Here’s the cabinet I bought for the sink.
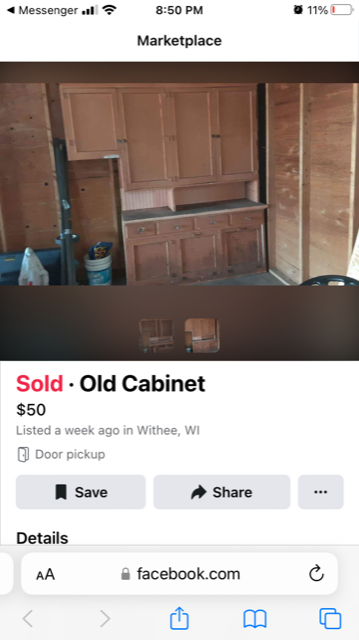
Yes, that’s right, I bought it for $50. Actually, I paid $60 because I only had twenty dollar bills. Then, since I only needed the lower part, I sold the upper cabinet for $40, so it really cost me $20. Plus paint, and new hinges, and some trim I added at the end to cover the shims because my floor is really crooked.
I also bought an old enameled iron drainboard sink. I don’t have a picture of this, but you’ll see it later in the progress pictures.
As you may have noticed, the sink cabinet had some major grime on it, so I removed the door and flour bins, and gave everything a good cleaning with soapy water, Clorox wipes, and finally acetone. This really had been used in a garage and it was filthy with grease and gunk. I threw away the hinges and replaced them. I didn’t want to take the time and effort to get the grease and rust off. And they didn’t all match anyway. Then I did a lot of sanding to smooth out the many layers of paint, which was pealing and crackling. I left some of the crackling on the doors to show its age. I also used some wood putty to fill in holes and fix damaged spots. Then I sanded that too.

My dad helped me do some alterations. We took out one of the drawers and shortened the one next to it to make room for a compact dishwasher. The sink will be going on the left side, so two of the drawers are going to be just fronts. Now it’s ready for priming.

And painting.

I didn’t paint most of the top because it’s getting a drainboard sink and butcher block countertop.
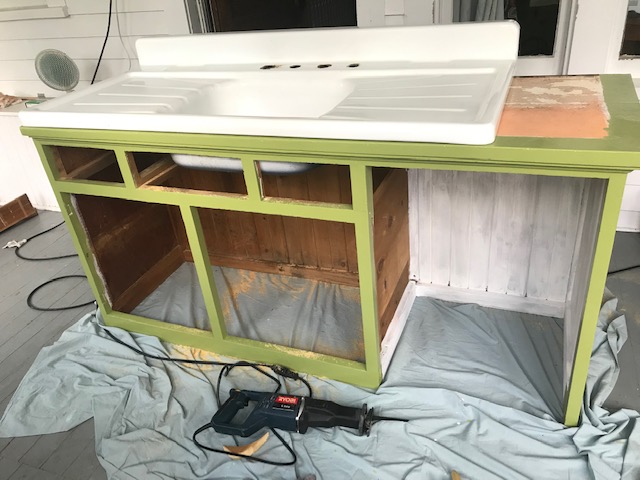
We cut a hole for the sink. I love the drainboards! They make up for having only one sink basin. You might notice that this all took place in my back porch. Now it’s time to put it in the kitchen. Here’s the technical part that required professional help. I had gotten a quote from a plumber the previous summer when I thought I was going to get it done last fall. A year later, he didn’t have time to do it, so my dad talked to a friend who has lots of handyman skills, and he and my dad drove up from Marshfield one day in August right before the end of summer break to get this installed. This turned out to be a blessing because his schedule was more open, and he didn’t charge as much as the plumber would have. And he did a great job. We got the pipes and hoses moved in the basement and the new cabinet and sink hooked up all in the same day. He also took care of the wiring for the dishwasher and garbage disposal. My dad and I installed the dishwasher a day or two later.
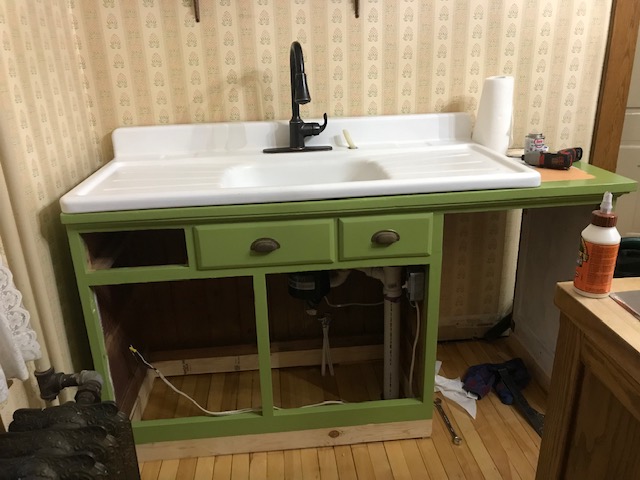
Tada! I used the same faucet, since I like it, and it was only two years old. I’m not so much of a purist to get an old-fashioned faucet. I like the utility of the one handle and the pull down sprayer. I installed the faucet all my myself, thank you very much. You might have noticed the extra wood on the bottom and the light shining through the gap behind the space for the dishwasher. This cabinet turned out to be too short and not deep enough too, but not nearly as bad as the other one. At this point the sink is fully functional.

Here it is with the dishwasher and half of the shelf under the sink. What’s wrong with the front of the dishwasher, you ask? I splurged a bit and bought a dishwasher with a customizable wood panel. I was going to go with a panel-ready dishwasher, but then I found one with a wood panel pretty much exactly like I was planning on building, for the same price, so it saved me some effort. I left the doors off and the drawer out to let the paint cure for a few days, and while I waited for the hinges I ordered to arrive.
Meanwhile…
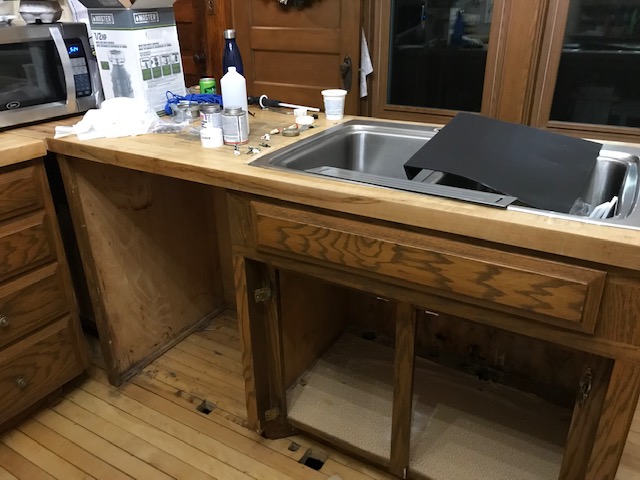
The dishwasher went to the garage and eventually out to the road where someone picked it up. It still worked fine, but there was some rust on the outside and the racks were in pretty rough shape. And the rubber seal was on it’s last legs. My dad cut off part of the butcher block to use on the new cabinet and the old sink cabinet went to the basement to someday be hooked up for a stained glass studio. I know, I have lots of plans. This left some holes in the floor, so my dad replaced pieces of some of the floor boards. I still have to sand, stain, and varnish them.

Here it is looking pretty much finished. I sanded down the butcher block before we installed it, and then it got sealed with food-safe mineral oil. I put all the hardware on the cabinets as well as the dishwasher door. I turned the dishwasher handle antique brass with an amazing product called Rub’n’Buff which makes you feel like King Midas, turning anything you want to gold. The drawer pulls came off of a different DIY project, so they didn’t cost me anything. I could have polished them, but I liked the patina. Dad helped me cut and nail the trim around the bottom and then I painted it. As you can tell my the bowl of tomatoes and the jars in the dish-drying rack, I finished this project just in time for canning season, which then took up most of my free time. But did you notice the towel holder? Here’s a close-up.
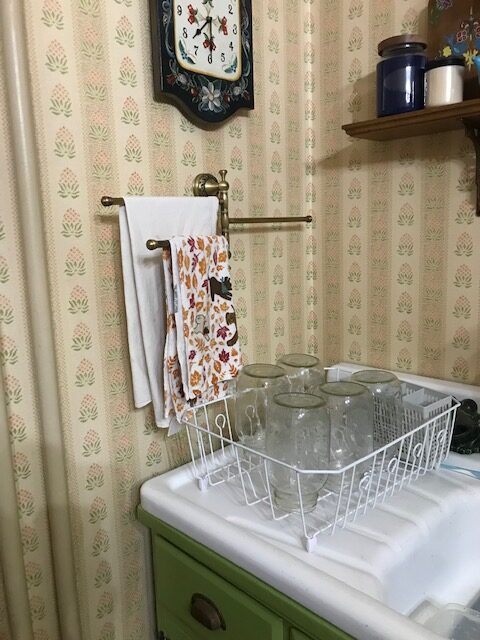
I found it while searching online for hinges, and I couldn’t resist. The three bars swivel and are really handy. This is an anachronism like the faucet, but I couldn’t resist.
Here’s that before picture again, as well as after pictures from the same position so you can see how this changed the flow of the room.
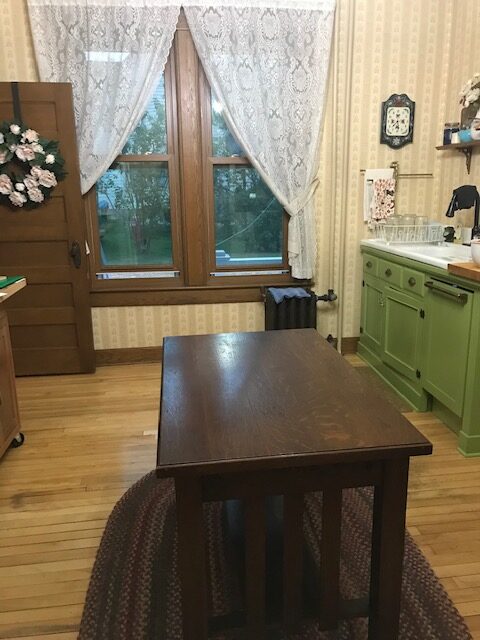

The table is an antique library table that I bought a year or two ago with the intention of using it here. At first I mostly used it to hold things, but I have recently brought a chair in and used it as a work surface where I can sit rather than stand at the counter.
I love my remodeled kitchen! I’ve found that I keep up with washing dishes much better than I used to because the new sink is somehow better for me ergonomically and doesn’t hurt my back like the old sink. Also, it’s so pretty that I really enjoy spending time in this room. The drainboard sink is soooo useful. My dish drainer lives on one side and the water runs right into the sink. The other side gets used a lot for washing produce or cutting things. Best place to cut a watermelon. The juice drains off the cutting board into the sink, not all over your counter. I do put a towel or cutting board down because older porcelain-enameled cast iron sinks contain lead, and as they wear, they can release the lead.
Here are some tips on how to manage that: Don’t use harsh abrasive or acidic cleaners. They can break down the enamel, causing it to release dust containing lead. Instead, use car wax or a special sink wax cleaner to clean it. You can also find a food safe wax to seal the enamel. This will also help to prevent staining and water spots. Use a rubber mat in the sink to avoid pans and knives damaging the enamel. Rinse any produce that’s been in the sink, or avoid direct contact with the sink by putting it on a cutting board or in a colander. And whatever you do, don’t lick the enamel. Hopefully I didn’t have to tell you that.
So that’s part 1 of my kitchen remodel. Hopefully part 2 will be up soon. I’ve already been working on the antique cabinets and I can’t wait to tell you about all the things I’ve learned about wood finishes.